In a first post, I went through the content of the kit. Taking pictures of all the parts was nice, but assembling the keyboard is even more fun! Again, I took quite a few pictures, I hope it’ll be useful somehow.
Category: Geek
XD87 TKL keyboard kit – Kit content
Time has come for a new keyboard! Now that I know I will always use a mechanical keyboard from now on (the typing feeling ❤), I’ve decided to invest a bit more into something nice, beautiful and customizable. So I bought the new XD87 kit that came out not that long ago.
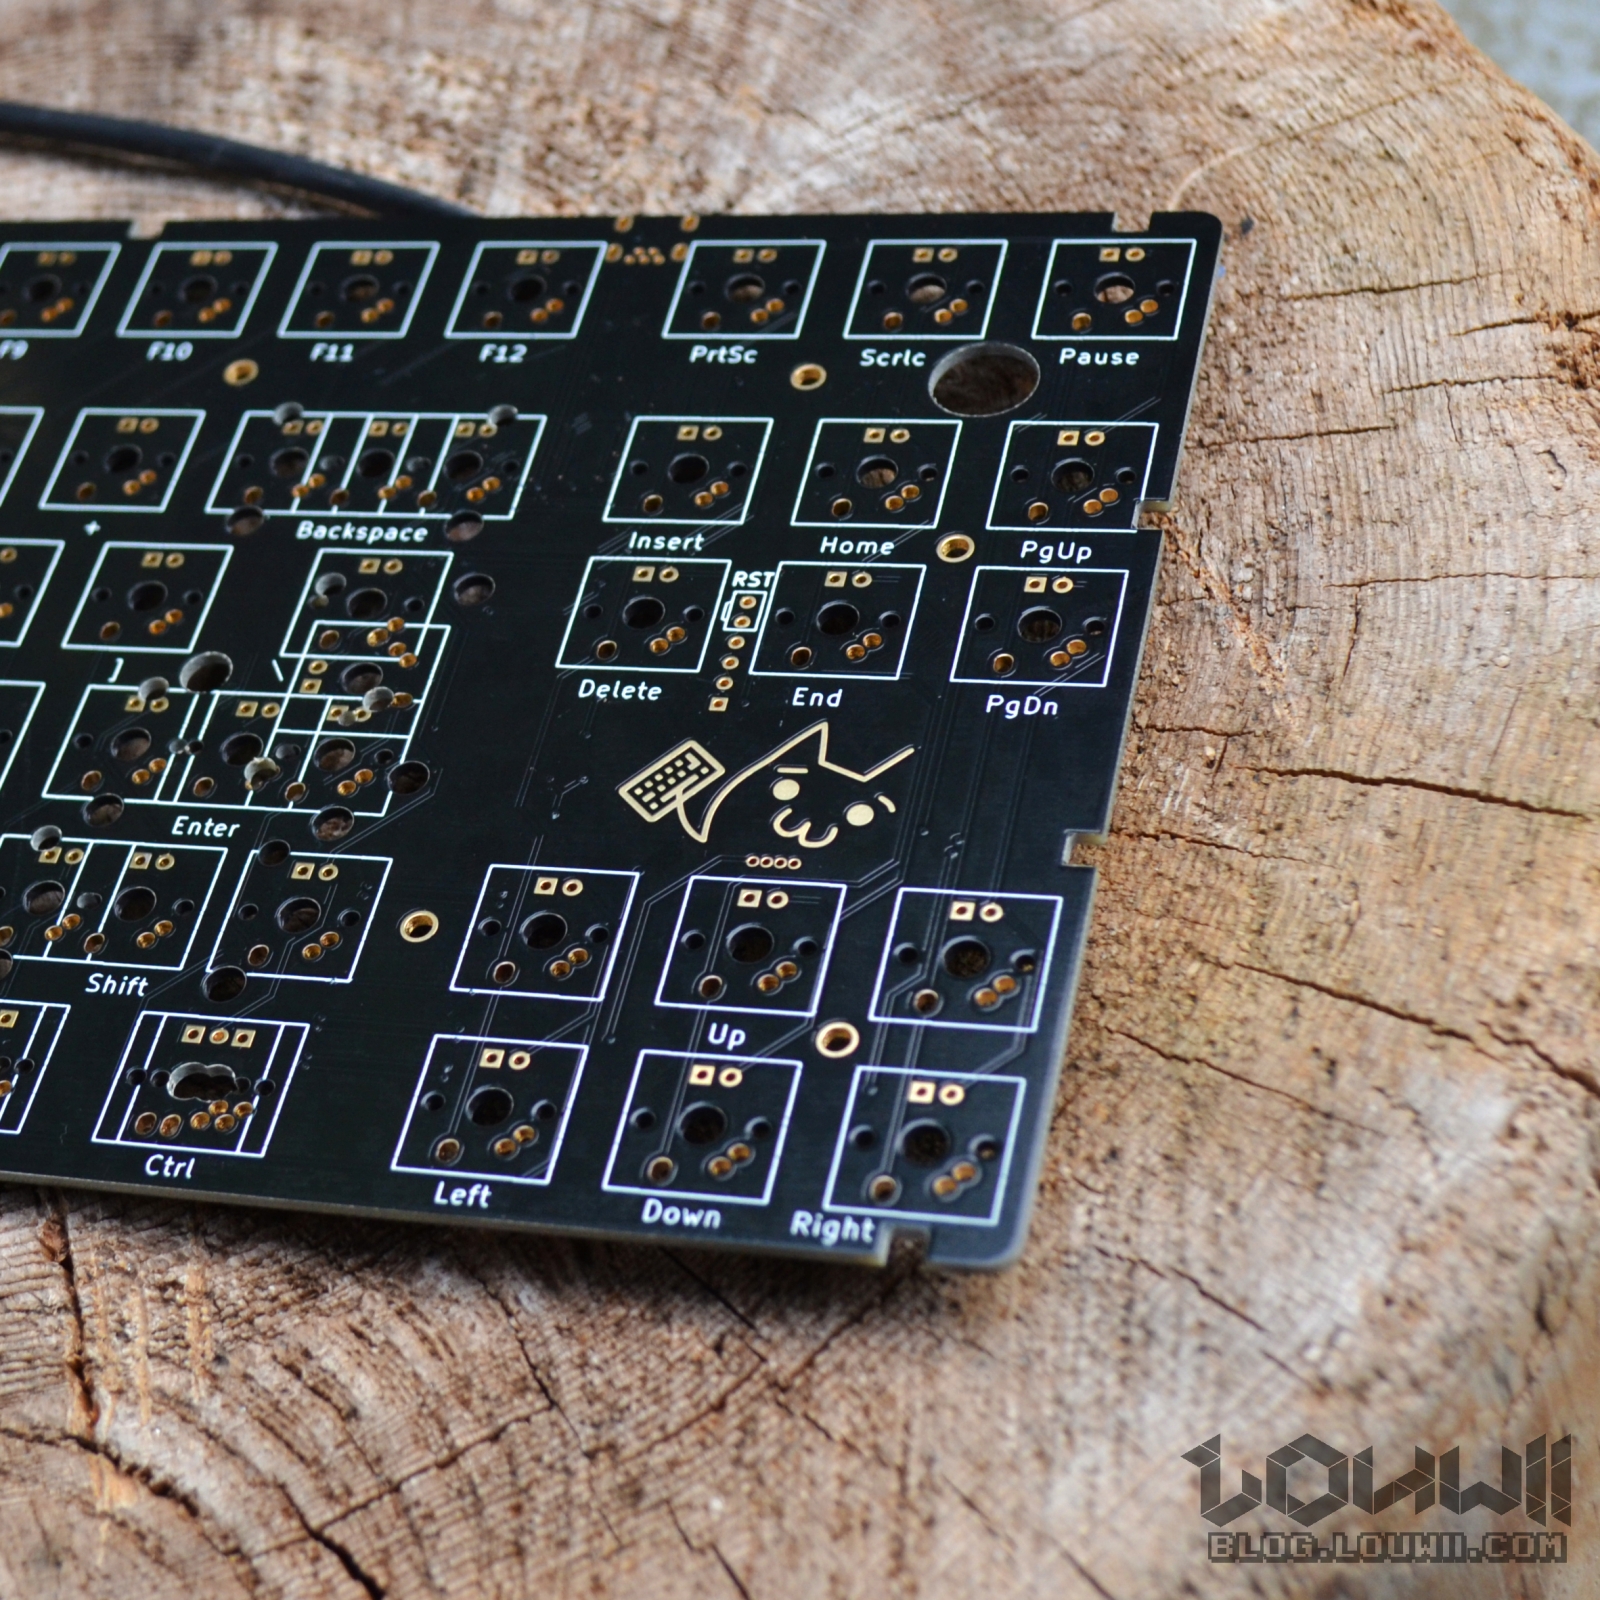
In this first article, I’ll just go through the parts that are included in the kit. I hope you like pictures, because I took quite a few.
Improve your GoPro footage
Like a lot of people, I bought a GoPro thinking “Yeah! I’m gonna film some sick footage and make an awesome video and post it on Youtube and…”. Blah blah blah, it appears that GoPro footage kind of sucks, whatever the situation.
There are a ton of Youtube video explaining how to get the most of your GoPro footage, but I found a really interesting one, using an uncommon and free software. So I just thought I’m gonna share that. Or at least keep a trace of it somewhere.
DIY: Electric Skateboard / Longboard
 I’ve been commuting by bike for more than 3 years now, and I like it, even if I live in a city where it rains quite a lot… During the last few years, I’ve seen electric skateboards becoming more and more popular and I really would like to try and see if it’s a good alternative to commuting by bike (plot twist, they can’t be used on public space where I live, but it’s tolerated). Unfortunately, the good models are above my budget, but I think I found a solution. (this post is under ongoing edit)
Updating my Nexus 5 from stock ROM to Lineage OS
It doesn’t seem like much, but it definitely requires some preparation and knowledge. I won’t detail all the steps in here, there are many tutorials on the internet. But it’s just a little recap with useful links and info.
I’ve mainly followed this guide (but it’s in french).
Backup your files
Many ways to do that. There are apps like Helium or Titanium Backup.
Google can save your data too.
You can also use the adb command to create backups from your computer (tutorial in french, easy to follow, it’s just command lines).
Connect your phone to USB and check all folders, especially the Pictures folder as everything will be wiped.
Unlock your phone
This will wipe the data of your phone. No other solution here, just do it. Tutorials are easy to find on the internet. I used this one.
I would recommend to reboot the device completely. It might have avoid my bootloop issue (see next part).
Install custom recovery
TWRP is the most famous one, so I chose this one. Go to the official page to download the img file (this is specific for the Nexus 5, the list of other devices is there). Instructions for the Nexus 5 are available on the site too.
I had an issue with the install, not sure if it’s because of the version (3.1.0 at that time) or my install file which was corrupted. But I ended up with a bootloop, but with fastboot still available.
After some research, it’s actually easy to fix that up. I found that thread in XDA forums, where a member says he followed that other guide to put his device back on the road (just replace stuff with Nexus 5 files and you’re all good).
Phew… I must say I was a bit stressed after seeing my Nexus 5 in a bootloop !
Boot to TWRP
Boot to fastboot (hold volume down + power buttons). Choose recovery with the volume button and press power to choose recovery.
Wipe those partitions:
- Dalvik / ART Cache
- System
- Data
- Cache
Install Lineage
Download the ROM file from the official Lineage OS site.
When in TWRP, the USB storage of your device should be available from your computer. You can copy the Lineage OS zip file to your phone.
I also put the md5 check file so TWRP can check the integrity of the file before installing it. If your rom filename is lineage-14.1-20170328-nightly-hammerhead-signed.zip, create a text file named lineage-14.1-20170328-nightly-hammerhead-signed.zip.md5, open it with a text editor and put the MD5 hash inside it. Be sure to copy it alongside the Lineage OS rom file on your phone.
Install it using the Install option in TWRP. Once done, wipe the cache as recommended by TWRP. Tap TWRP icon on the top left to go back to TWRP menu.
Install Google Apps via Open GApps
Go to http://opengapps.org/ to download the Google Apps package. The Nexus 5 is using an ARM processor. Note that I tried to install the Stock package, but it failed because of the size of the System partition being too small. I had to go down to the Micro package to be able to install the apps.
Same thing as above, put the zip file on your device, along with the md5 file (you can download that file directly from the open GApps site). Install it using TWRP, wipe the cache, and you’re done.
Reboot and enjoy
Reboot the phone and let LineageOS boot. It will take some time to boot at first.
Restore the files using whatever method you chose. I personally just restored things from my Google account. I don’t mind loosing some data as I didn’t have anything important.
Secure phpMyAdmin install with Fail2ban
First, let’s change the address to access phpMyAdmin. By Default, it’s ser.ver.ip/phpmyadmin.
I’ve copied the original phpmyadmin apache config file so I can customize it as I want, and still have the original one in case mine is broken. sudo cp /etc/phpmyadmin/apache.conf /etc/phpmyadmin/apache-custom.conf
At the top of the custom file, change the 3 line Alias /phpmyadmin /usr/share/phpmyadmin to something else, like Alias /phpthisismine /usr/share/phpmyadmin
Now, I don’t know how your apache is setup to take into account the phpmyadmin configuration file. On my server, it wasn’t added automatically, so I’ve added it myself in /etc/apache2/apache2.conf. At the bottom, just add Include /etc/phpmyadmin/apache-custom.conf.
Now, in order to deal with those stupid bots, if they ever find the URL, it would be nice to have fail2ban take care of those f*ckers. The problem is, phpMyAdmin doesn’t log any failed login attempt (bummer !).
Well actually, this is what I found:
phpMyAdmin uses php’s apache_note function to make this work. AFAIK this function is only available in mod_php mode. This will not work with mod_fcgi & co.
And I’m using php-fpm so I need to modify phpMyAdmin to log failed attempts. Let’s edit /usr/share/phpmyadmin/libraries/plugins/auth/AuthenticationCookie.class.php (I know, that’s bad, but what can I do ?).
Find the authFails() function and inside, right after the last header() call, add error_log(‘phpmyadmin: authentification failed’);
|
1 |
[Wed Jan 18 06:56:33.915985 2017] [:error] [pid 12423:tid 140093452912384] [client 99.99.99.99:64335] FastCGI: server "/usr/lib/cgi-bin/php" stderr: PHP message: phpmyadmin: authentification failed, referer: http://88.88.88.88/phpthisismine/index.php |
Hell yeah.
Now let’s setup fail2ban. Create a file /etc/fail2ban/filter.d/apache-phpmyadmin.conf and place that inside
|
1 2 3 |
[Definition] failregex = .*\[client <HOST>:[0-9]+\] phpmyadmin: authentification failed.* ignoreregex = |
Now edit your local fail2ban configuration file. Mine is /etc/fail2ban/jail.local and add
|
1 2 3 4 5 |
[apache-phpmyadmin] enabled = true filter = apache-phpmyadmin port = http,https logpath = %(apache_error_log)s |
Reload fail2ban sudo service fail2ban reload and you’re all set !
A special Christmas message to nerds everywhere
A special Christmas message to nerds everywhere . . . pic.twitter.com/CgBlbc3WoV
— 50 Nerds of Grey (@50NerdsofGrey) 21 décembre 2016
Where will the incident with the sudo command be reported to? Here
Where will the incident with the sudo command be reported to? Here via https://t.co/Gq3hRVmKmV #unix #humour #linux pic.twitter.com/tNJ7x84Ywy
— nixCraft (@nixcraft) 16 décembre 2015
IPSEC VPN server on Ubuntu 16.04 with StrongSwan
IPSEC VPN on Ubuntu 16.04 with StrongSwan https://t.co/385sySD8zk
— Louis D. (@LouWii59) 21 décembre 2016
Enlarge your Virtual Box virtual drive and resize your Linux partition correctly
Enlarge your Virtual Box virtual drive and resize your Linux partition correctly https://t.co/4KjVfQLs1l #Linux #vm #Ubuntu
— Louis D. (@LouWii59) 15 décembre 2016