Time has come for a new keyboard! Now that I know I will always use a mechanical keyboard from now on (the typing feeling ❤), I’ve decided to invest a bit more into something nice, beautiful and customizable. So I bought the new XD87 kit that came out not that long ago.
In this first article, I’ll just go through the parts that are included in the kit. I hope you like pictures, because I took quite a few.
This is the first article of a 3 articles series:
- XD87 Kit content (this article)
- XD87 assembly
- XD87 firmware/layout customization
- XD87 firmware extra: QMK instead of TMG
The kit I bought came from KPRepublic, a shop specialized into mechanical keyboards. They offer different packages, the one I bought contains: white case, PCB, switches (Gateron reds 3pins) and plate. Now let’s dive in.
Case
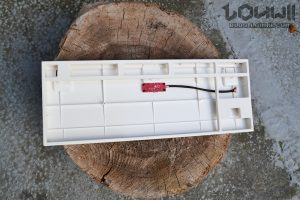
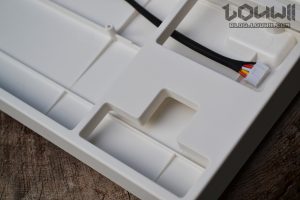
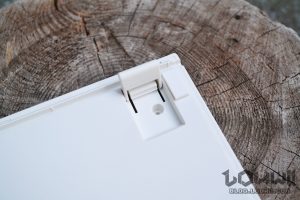
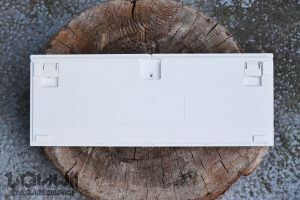
At first, I wasn’t sure about getting the white or black one. I went for the white one (which is actually more like a “creamy” white) and I don’t regret it, it looks very nice. I like the matte finish, it gives it a not-so-cheap look. The case is clean, compact, has the usual foldable feet and also cable guides so you can make the USB cable go out on each side or at the back. The plastic is 1.5mm thick (measured at the edges). All cut-offs and trim marks are either on the inside or at the bottom, nothing is visible once the keyboard is assembled. There are 4 rubber pads on each corner, as well as on the feet. All that for around $15 (if buying the case by itself), that’s a good deal. It’s pretty much a copy of the Leopold FC750R PD case, without the hole at the bottom for the 4 switches.
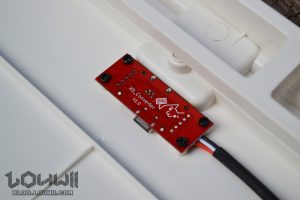
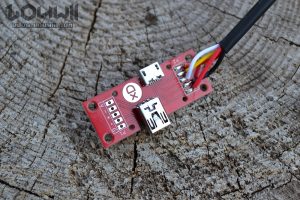
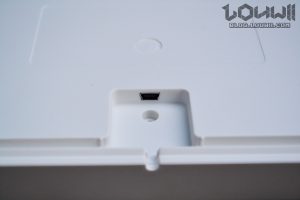
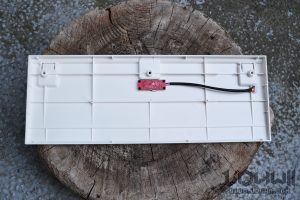
Note that the case is delivered with a USB module. That module has both mini USB and micro USB ports, but the case is made for a mini USB output.
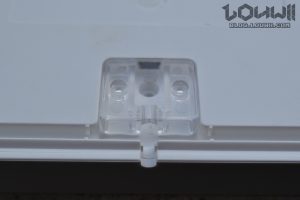
Talking about the USB port, there’s a clear plastic piece that goes right where the USB cable is supposed to plug in. I guess that this is for maintaining the cable in place. But even though the clear piece has holes, there are none on the case itself.
The case is divided in 2 parts: one for the top, one for the bottom. The top one goes over the bottom part and clips in via 9 plastic clips. The kit contains a prying tool to help you un-clip the 2 parts. There are also 3 screw holes to secure the 2 parts together, once your keyboard is assembled. Honestly, I didn’t even screw the 2 parts, everything is so tight that the 2 parts will never detach themselves.
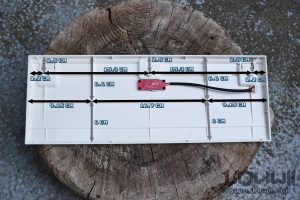
The bottom part dimensions are 35.3cm x 12.9cm. The top part is 36cm x 13.6cm. I’ve also measured the internal dimensions if you’re that curious.
Accessories
I’ve talked about a few accessories that are included in the kit, let’s take a look at them.
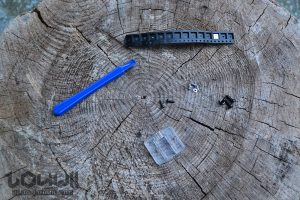
As I mentioned earlier, the blue prying tool is for separating the top part from the bottom part of the case. I won’t explain what the clear piece is again.
The black stripe is supposed to contain 14 RGB SMD LEDs. The PCB has 14 spots for soldering RGB LEDs for underglow lighting. I only have one left because… I couldn’t resist and began to solder them before taking pictures (click here to see more about the building process). The PCB is compatible with WS2812 and SK6812 LEDs.
The 3 biggest screws are for securing the top and bottom parts of the case together.
I assume the 4 smallest ones are for screwing the USB module to a case. But as you saw mine was already screwed to the case. I actually received a second USB module attached to the PCB, I’m not sure why.
The last 2 screws are probably for attaching the clear piece. But that’s a guess, as there are no holes in the case for them.
There’s one last piece that’s missing on the picture. It’s a PCB mounted mini USB port that you can solder directly on the PCB itself, if you ever want to.
PCB
Probably the most interesting part of that kit!
Onto the characteristics first. The PCB accepts MX and ALPS switches. It has a standard ICSP interface and a REVQE/REVB expansion port. It has RGB underglow lighting and per-key backlighting (but simple LEDs, not RGB). The layout is customizable via Keyboard Layout Editor and its firmware can be flashed using TKG tools, offline or online.
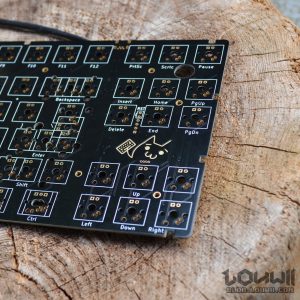
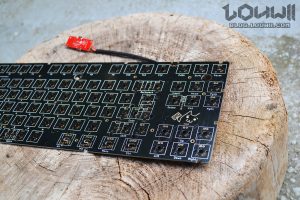
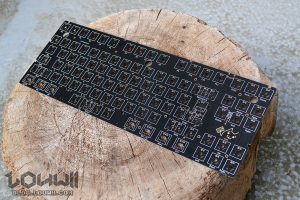
I’ve only seen a few PCBs in my life, but that one definitely looks really good. I’m sad it’ll be hidden once in the case. I’m not a PCB expert but the quality seems to be ok. I didn’t notice anything strange. The components are straights and soldered cleanly, no residue of flux. Keys are indicated on the PCB itself (the newbies will like that!). Bonus point for the keyboard kitty 😸.
As you can see in the picture below, a few of the switch spots allow for different positioning. This is nice, but can lead to confusion if you don’t pay attention. I had to check with some keycaps where to install some switches (for the Ctrl, Alt, Win Space bar keys mainly). Note that you can install a split space bar on that PCB as well.
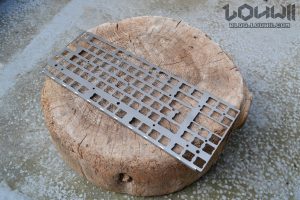
There are 3 unusual switch spots on that PCB, one between Esc and F1, and one on each side of the up arrow key. Those aren’t accessible with the case that’s shipped with the kit, but the steel plate has spots for them. You can also notice that the stabilizers are PCB stabs (there are holes in the PCB for them), and they are not included in the kit (I didn’t see that coming, totally forgot to get some…).
As I said earlier, my PCB came with a USB module as well (I actually got 2 with my kit). I’m not sure if that’s to be expected or not, but anyway. That leads to a small downside of my kit (this probably won’t happen to everyone), the USB module attached to the PCB has scratched up the back of the PCB, probably due to the pins of the USB post that’s soldered on the module. I know, that’s nothing. But it’s the only “quality” downside I found so far so I thought I’d mention it.
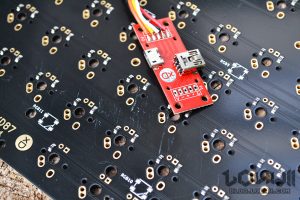
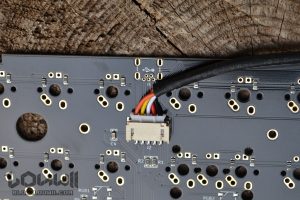
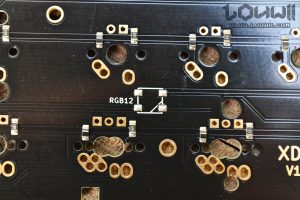
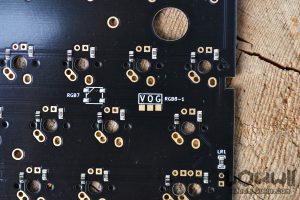
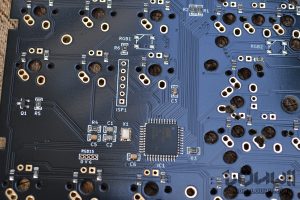
The next pictures show various details of the PCB: the spot for soldering the mini USB port, one of the spots for the RGB SMD LEDs underglow and an RGB 8-1 interface for controlling an external RGB LED (I’m not sure what VOG means… after looking at the LED datasheet, the 4 pins should be VSS, DIN, VDD and DOUT, I assume power or ground is missing). The last picture shows an RGB 15 port (with VOG pins again, but different order, and a 4th pin) the ISP1 port and the main electronics. The top 2 contacts of the ISP1 port are used for switching the keyboard into flash mode, for flashing a firmware.
Steel plate
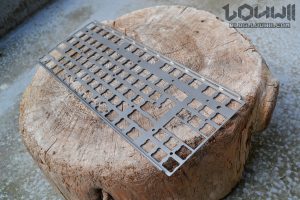
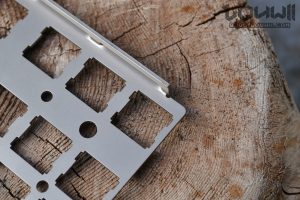
Nothing fancy about the steel plate, but it is a decent one. It’s very rigid due to its top and bottom edges being bent up. It has a really nice finish, smooth and not too shiny. The colour is kind of dark grey-ish. The plate is also quite flexible regarding switches positioning.
That’s it!
That’s pretty much it for that kit, we covered all of it.
I think it’s a very good DIY kit. TKL keyboard kits aren’t that common and this one is available at a very good price. The PCB is flexible enough to satisfy most users and the firmware is fully customizable. It has backlighting and underglow if you ever like that. The only improvement that the PCB could have is RGB LEDs for keys and maybe hot-swapable sockets for switches, but that’s really pushing it.
As I said, there are several packages available and some provide everything you need beside keycaps (which is expected) and… stabilizers?! I still don’t understand why stabilizers aren’t included. The most complete package offers you everything you need, up to the USB cable, but no stabs. So don’t forget to buy some.
I wrote 2 more posts about that kit: XD87 Build log and How to customize your XD87.

what are those +- holes to the left of caps lock?
I have only 0.1V on them instead of 5V on diods’ holes.
I’m pretty sure they are for indicating if caps lock is on or off, like commercial keyboards do it.
Hey! thanks a lot for this!
I’ve just bought the same plate and case and wanted a review just to know the details, I got gateron yellows for my TKL.
I’m just wainting it to arrive, I can’t decide which keycaps though.
Any recommendations?
I’ve seen this kit on candykeys and it looks beautiful for the white case, but its 90€ yay!
https://candykeys.com/product/gmk-white-on-black-iso-de
Thanks again, I will dive in on this post.
GMK are well known in the mk community. They are expensive but are supposed to be very good. This one is a bit too “classic” for me though, I like having a bit of originality in my keycaps 🙂
Hi Louwii, thanks for your detailed post on the XD87! I’ve just ordered one, but I’m still unsure about the LED backlights.
What voltage should the LEDs be? I ordered the kit without the switches because I already have some, but the kit doesn’t come with any LEDs.
Also, do you have any more detailed information on how the LEDs should be installed?
Thanks again!
I tried to find which ones I ordered but I couldn’t. They’re just standard 3mm LEDs, single colour (2 pins), the most common ones in 3mm. I never paid attention to the voltage to be honest.
Installation is super simple. You solder the switch first. Then you need to insert the LED into the dedicated spot in the switch. The only tricky part is the direction of the LED, you need to make sure it’s correct otherwise the LED won’t light up. If you look at the 2 holes for the LED on the PCB, there’s one with a round pad, and one with a square pad, which indicate which is + (long leg on the LED) and which is – (short leg on the LED). The only problem is that I don’t know which is which… You’ll have to try, it’s either one or the other. Once you know though, it’s easy as they’ll all be the same.
hey do you think this pcb will fit in a leopold fc750r
I have no idea. I don’t have a Leopold FC750R.
Both case molds look similar, but not exact.
You might have to mod the Leopold case to fit the XD87 PCB.
Leopold disassembly:
https://sudonull.com/post/22307-Review-Leopold-FC750R-Impeccable-aesthetics
Probably best to order an entire XD87 kit and buy some keycaps, sell the Leopold to recoup cost.
Does it come with usb cable?
I actually don’t remember, sorry. It uses a mini-USB port, you might have one laying around.
It’s been a while, but do you by chance have the dimensions of the steel plate? Trying to figure out if this would fit any other cases.
The plate is 34.7mm x 12.7mm. You’re lucky I have this keyboard disassembled ^^