My Homelab: Hardware
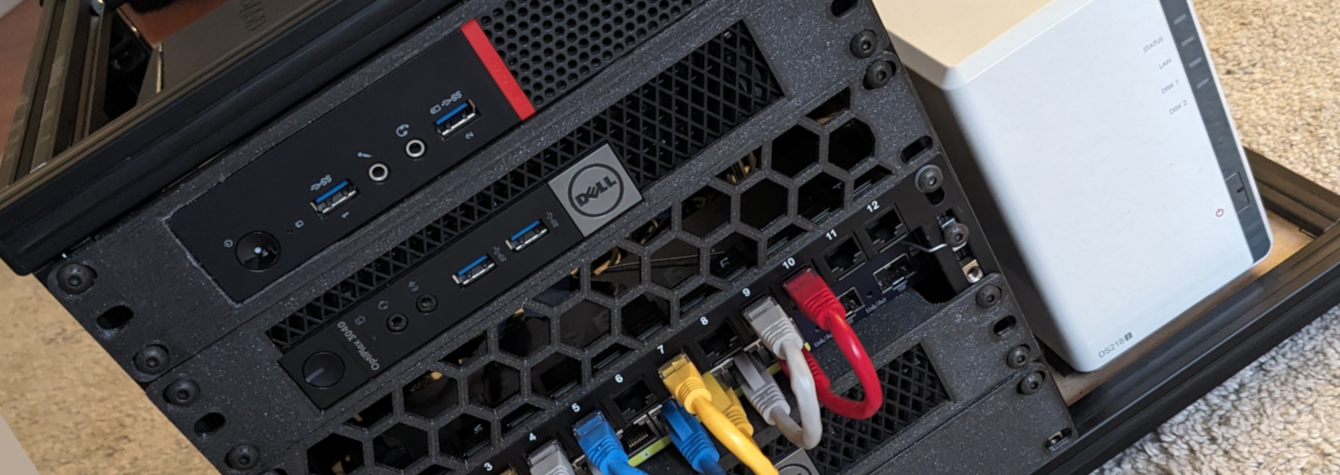
I fell into the Homelab rabbit hole a while back. Here’s all the toys it’s composed of. A few computers, a switch, an AP, nothing too fancy, but plenty enough to have fun and host a bunch of things. ...
I fell into the Homelab rabbit hole a while back. Here’s all the toys it’s composed of. A few computers, a switch, an AP, nothing too fancy, but plenty enough to have fun and host a bunch of things. ...
I’ve recently got a GoPro 7 Black with a non-functioning touchscreen. I was hoping to use my smartphone to control the GoPro, but they removed a bunch of settings from their app, apparently due to an ongoing lawsuit. It’s possible to get them back though, here’s what I found. First things first, I own an Android phone and focused my research on that OS only. Also, some of those tips might not work with your camera (beside the rollback), please do your own research before doing anything. I am not affiliated with any of the sites/apps listed below. ...
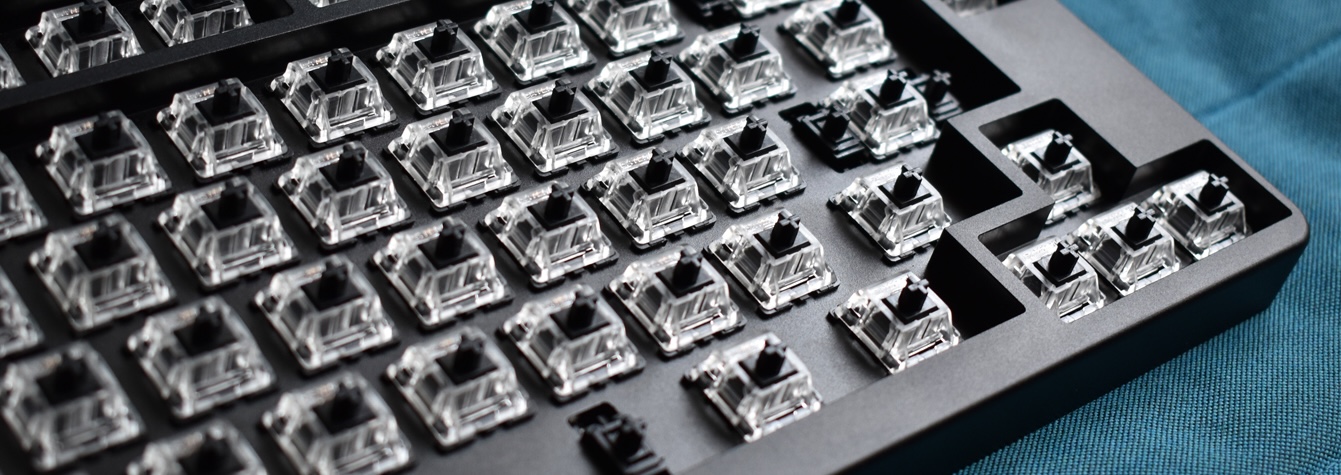
Yes, another keyboard. No it won’t be the last one, there’s no point on trying to fool myself. This kit is available on AliExpress and was also sold on Drop (previously Massdrop). The one I got was from Drop, 1st batch. The ID80 is relatively cheap compared to other keyboards with a full aluminium case. And it’s hotswap. And it runs on QMK. That’s why I decided to buy it. I only own plastic/acrylic keyboards and really wanted to know how an aluminium one feels and sounds. ...
I already went through the customization of the XD87 (HS) keyboard via TMK using a layout from KLE in this blog post (along with general information about keyboard layout customization). The XD87 now has QMK support. That firmware is based on TMK, so it has the same principles but is a bit different in multiple aspects. Let’s look at them and see how to flash QMK on the XD87 (HS). The difference between TMK and QMK as an end user aren’t really significant as they offer pretty much the same features. However, the path that leads to your flashed and ready keyboard is quite different. ...
I told you I really wanted to build a new keyboard when I finished the previous one. Well here I am again, but with a different build in mind this time. First, I’m going for a smaller size. Second, I’m taking parts from different places (well, 2 different sellers…). Third, the RGB underglow is gonna be useful this time. Let’s dive in. Wanting to build another keyboard is cool, but there’s no point in building one that I already own, so let’s find something new. ...
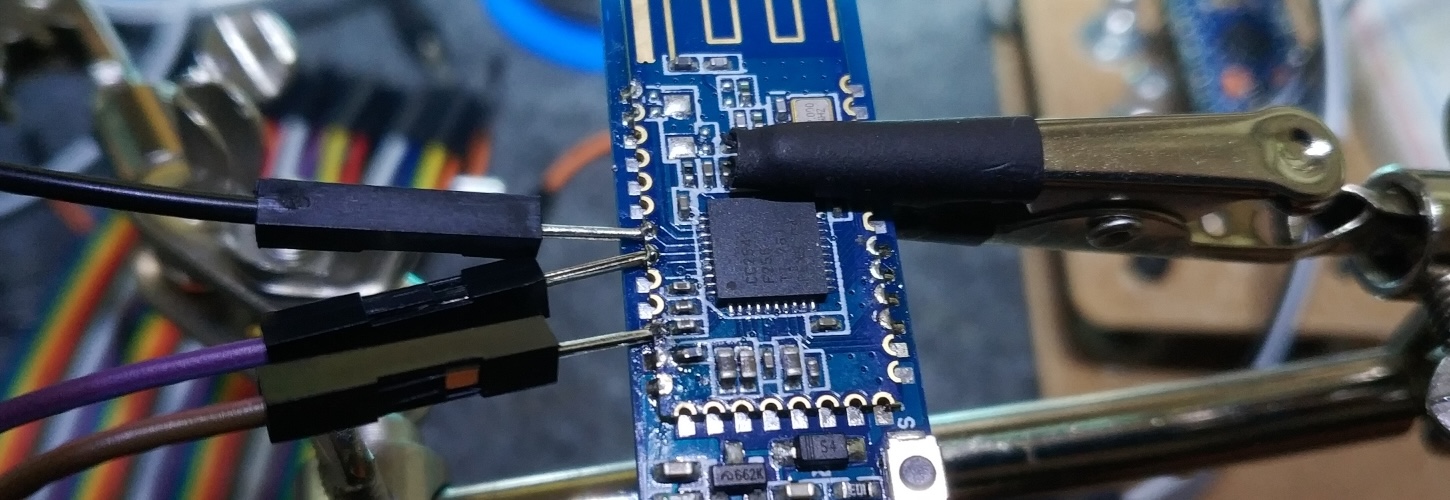
The HM-10 and BT-05 modules are cheap bluetooth modules that can be used in various situations, like with an Arduino board. But most of the cheap ones use a buggy firmware that make them incompatible with Android 8. There’s a way to fix it though. If you want to know more about the bug, this blog article contains really good information. The whole thing is actually a bit of a mess, because chinese manufacturers or sellers sometime mislabel the products. What’s important here is that the main chip used by your module is from the CC41 family. It’s often the CC2541. ...
In a first post, I went through the content of the kit. Taking pictures of all the parts was nice, but assembling the keyboard is even more fun! Again, I took quite a few pictures, I hope it’ll be useful somehow. This is the second article of a 4 articles series: XD87 Kit content XD87 assembly (this article) XD87 firmware/layout customization XD87 firmware extra: QMK instead of TMG Preparing The first is to make sure you have everything you need to assemble the keyboard. Let’s make a quick list of the keyboard parts needed. Make sure you have all you need before beginning, it’s always annoying to start and realize you have something missing and having to wait for it to be delivered. ...
One of the best feature of the XD87 PCB is that its firmware is fully customizable. Although this might sound complex and probably way too much, customizing the firmware allows you to create your own layout for the keyboard. Let’s dive in. Don’t know what I’m talking about? See this article first. This is the last article of a 4 articles series: XD87 Kit content XD87 assembly XD87 firmware/layout customization (this article) XD87 firmware extra: QMK instead of TMG Note: I’m just providing indications on how to customize and flash the keyboard. That’s how I did it and it worked for me. However, I won’t be responsible for any damage you do to your keyboard. That’s how DIY works, you do whatever you want, the way you want, and you’re accountable for everything you do. ...

Time has come for a new keyboard! Now that I know I will always use a mechanical keyboard from now on (the typing feeling ❤), I’ve decided to invest a bit more into something nice, beautiful and customizable. So I bought the new XD87 kit that came out not that long ago. In this first article, I’ll just go through the parts that are included in the kit. I hope you like pictures, because I took quite a few. ...